When scaling any race car, there are a few simple but important steps to follow. We use Longacre electronic scales, with each load cell marked for the the corner of the car it goes to.

The first step is to level the scales. We purchased an extendable bubble level from Menards, that works great for the job. Each scale should be leveled, and then the four load cells checked against each other. Without doing this, you will never get an accurate reading of your cars corner weights. We have seen guys scales cars in the dirt at the track, on race day. The shop floor is the best place to do this, and most floors are not all that level either.


The first step is to level the scales. We purchased an extendable bubble level from Menards, that works great for the job. Each scale should be leveled, and then the four load cells checked against each other. Without doing this, you will never get an accurate reading of your cars corner weights. We have seen guys scales cars in the dirt at the track, on race day. The shop floor is the best place to do this, and most floors are not all that level either.

The car should be placed in gear so it will not roll. In addition, we put some pieces of steel against the tires, to keep the race car firmly in place. Tire pressures should be set as they are for race day. Hoosier recomends 23 to 26 lbs. cold for our compound, so we have been using 24 pounds as our starting point. After that, we add bags of salt to the drivers seat. The salt bags are each weighed, to insure that we get the same weight as the driver will bring to the seat. This makes it easier for your "hot shoe" to participate in the scaling process as well. Before adding the salt, we set the corner heights to the rules, to get close to our starting point, the work to be done.

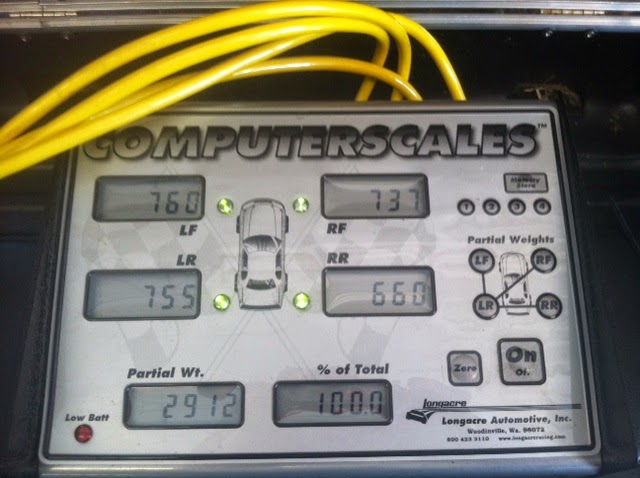
Our experience from the circle track days has been that adding a driver to the vehicle takes wedge (LR/RF) percentages from the static settings. With the road race car, we prefer to have the LF/RF weights a close to equal as we can get. If you are scaling a roundy roundy racer, make sure the sway bar is not preloaded, which will throw off your readings. The bar should be fully backed off for scaling. Due to our heavy driver, all the balast has been removed from our Howe Port City vehicle (former ASA racer). You may need to add some, to bring the car up to minimum which in our case is 2830 lbs, for GT-2.
You will need to make corner corrections, to get the car where you want it. With coil over shocks, this is really easy. Make adjustments at all four corners. For example if you need a little more LR/RF, then put a turn in the LR/RF, and take a turn out of the RR/LF. We run Pro Shocks, with double adjustables on the front, and rebound adjustables on the rear. Find someone to dyno your shocks, and make sure that there is no abnormalities in the curve, which can be seen in a computer print out from the dyno run.
Our car has gotten a little loose a couple time, in tight right hand turn situtations. We went a little softer on the front springs, that what was in the car when we received it. This is really the fun part of the whole thing, making small adjustments, and seeing how they affect the feel of the vehicle.
Our car has gotten a little loose a couple time, in tight right hand turn situtations. We went a little softer on the front springs, that what was in the car when we received it. This is really the fun part of the whole thing, making small adjustments, and seeing how they affect the feel of the vehicle.

No comments:
Post a Comment